源码运行
下载源码
工作流源码深度依赖数字底座源码,首先需下载数字底座源码,请先点击进入数字底座源码运行 下载数字底座源码。
工作流源码下载地址: https://gitee.com/risesoft-y9/y9-flowable.git 。如下图所示: 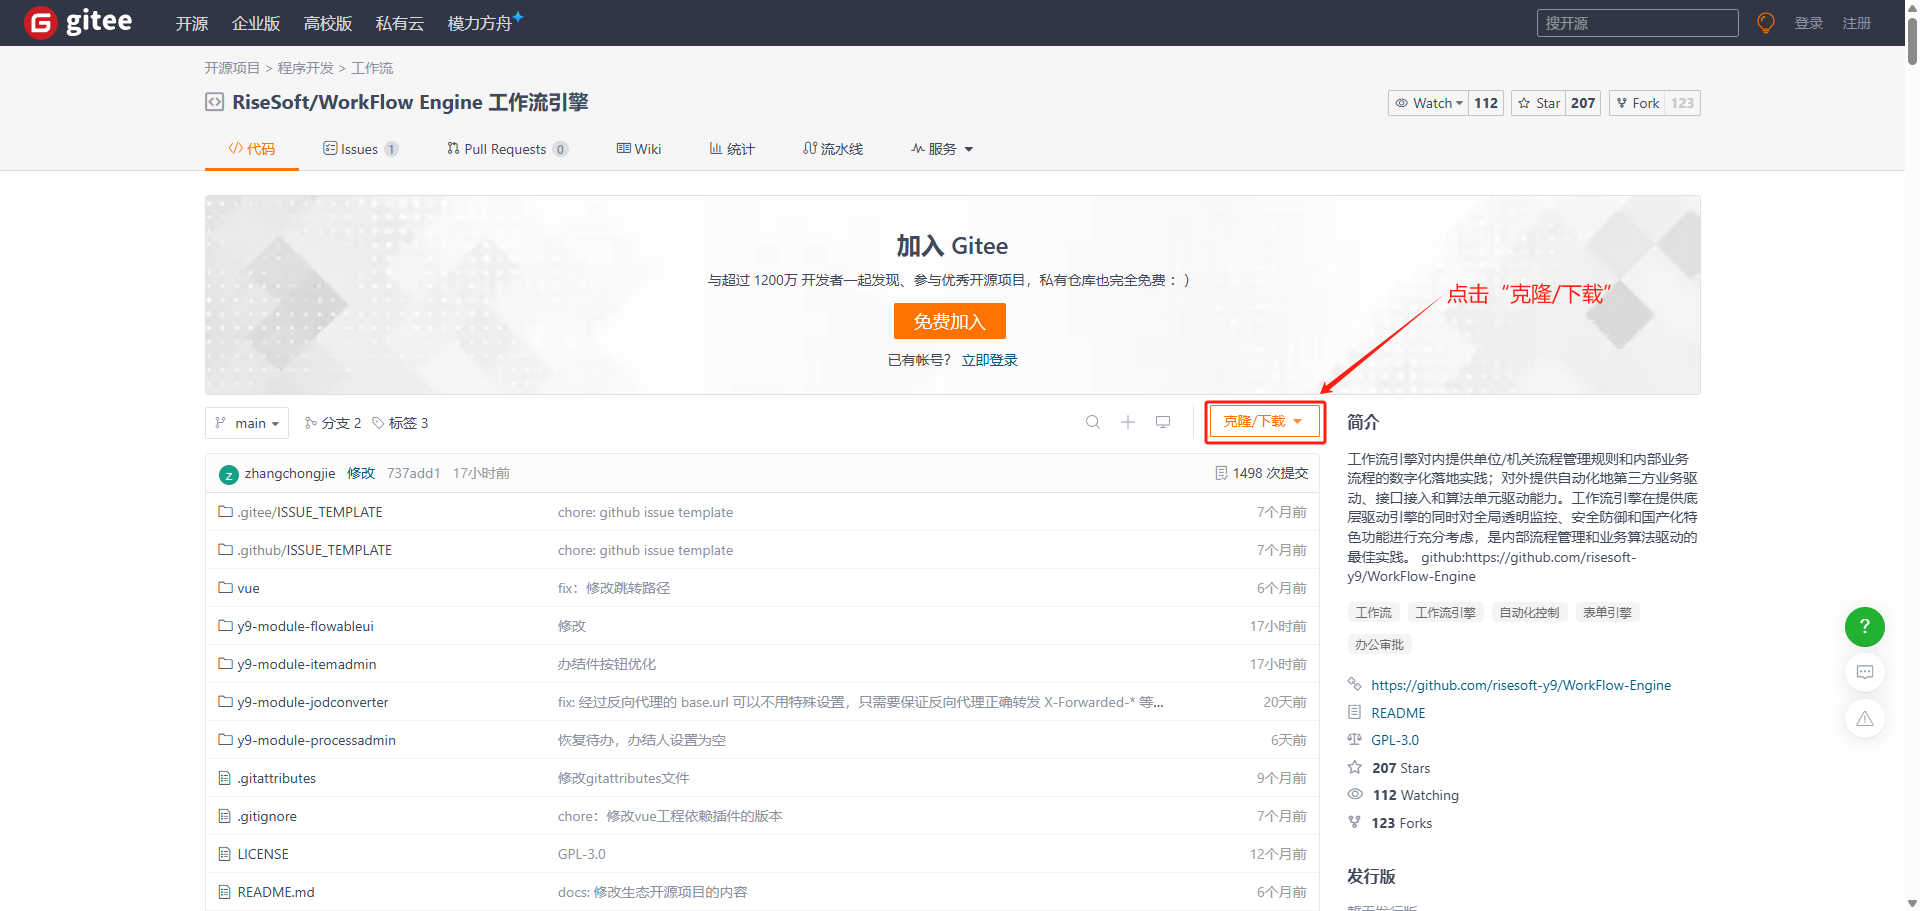 下载源码:可通过下载ZIP包、复制Https地址、复制命令到终端进行下载。如下图所示:

后端项目
注意:
所有环境编码格式必须为 utf-8。
请确保数字底座所有中间件都已按照要求进行安装,且创建了名字为 y9_public 的数据库(编码格式为 utf8mb4)和 y9_flowable 工作流程默认库(编码格式为 utf8mb4)。
IDEA
1. 引入项目
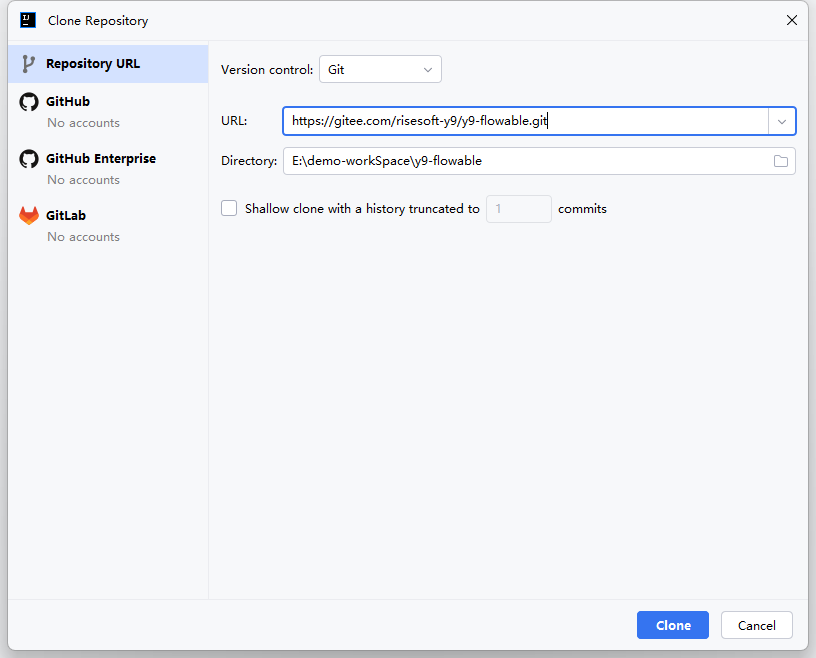
当前引入项目选择复制Https地址下载导入工作空间,打开 IDEA,点击左上角的 File,在下拉选项中选择 New,然后,在右侧显示的菜单选项中选择 Project from Version Control...,如下图所示:

复制工作流源码地址 https://gitee.com/risesoft-y9/y9-flowable.git ,源码地址,粘贴到Url输入框中,然后,选择源码下载的工作空间( 注意事项:需选择跟数字底座同一个工作空间,以方便管理),最后,点击“Clone”按钮下载源码。如下图所示:
2. 修改配置文件
在数字底座y9-core/pom.xml添加模块y9-flowable方便进行项目统一管理,如下图所示:
<modules>
    <module>y9-digitalbase-common</module>
    <module>y9-digitalbase-dependencies</module>
    <module>y9-digitalbase-example</module>
    <module>y9-digitalbase-idcode</module>
    <module>y9-digitalbase-starter</module>
    <module>y9-digitalbase-support</module>
    <module>y9-digitalbase-module</module>
    <module>../y9-flowable</module>
</modules>
重新打开 IDEA,选择 Open,找到源码目录选择最外层的根目录 y9-core(包含 common, starter, support 等)打开,如下图所示: 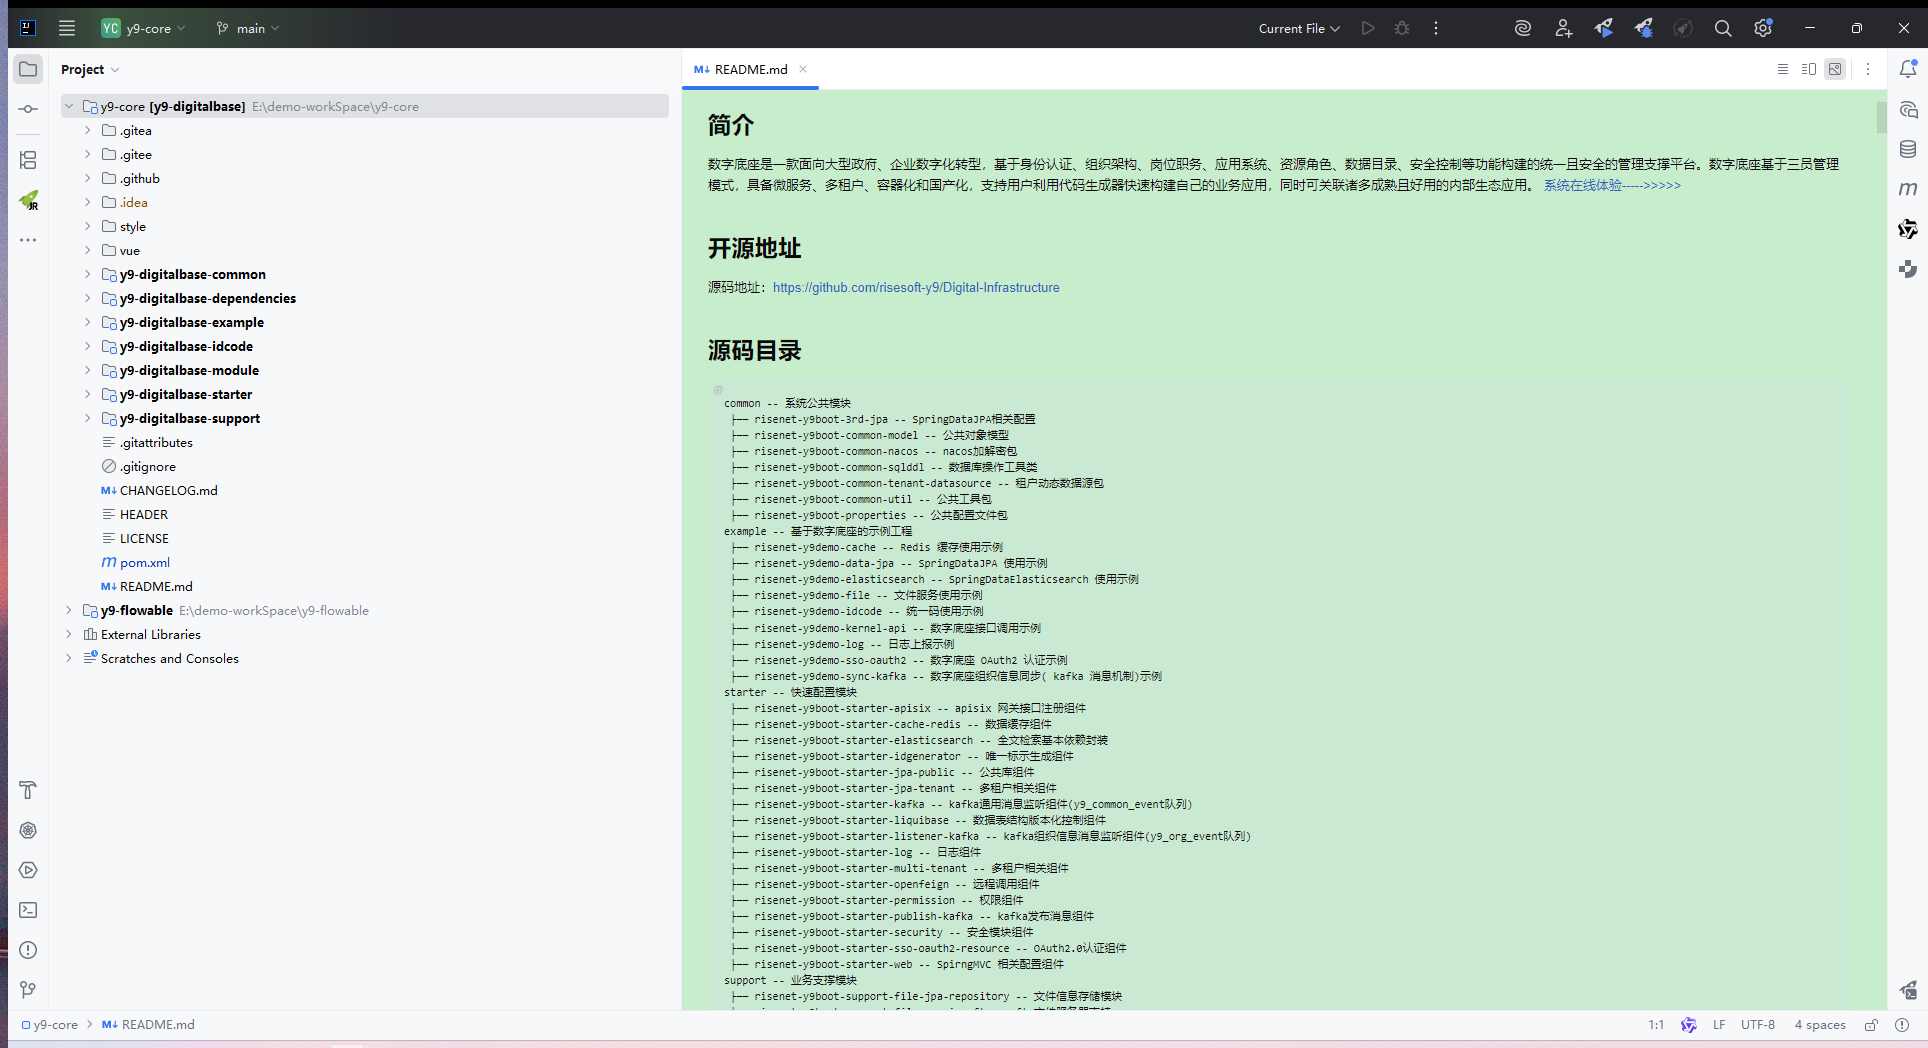 修改各项目的配置文件
 application.yml,将 MySQL、Redis、Kafka 等服务端口和密码改为自己的服务地址和密码。(如果是按照数字底座的默认密码设置的各个中间件密码,则不需要修改配置文件。)
对于未使用的中间件,对应的设置可以不用修改,不同的数据库适配详细配置,请点击参考数据库适配 ,以下为 MySQL 数据库的数据源连接配置:
risenet-y9boot-server-flowableui 工程配置:
spring:
    datasource:
        druid:
            y9-public:
                url: jdbc:mysql://localhost:3306/y9_public?serverTimezone=GMT%2B8&nullCatalogMeansCurrent=true&useUnicode=true&characterEncoding=utf-8&rewriteBatchedStatements=true&useCompression=true&useSSL=false&allowPublicKeyRetrieval=true
                username: root
                password: 111111
risenet-y9boot-server-itemadmin 工程配置:
spring:
    datasource:
        druid:
            y9-public:
                url: jdbc:mysql://localhost:3306/y9_public?serverTimezone=GMT%2B8&nullCatalogMeansCurrent=true&useUnicode=true&characterEncoding=utf-8&rewriteBatchedStatements=true&useCompression=true&useSSL=false&allowPublicKeyRetrieval=true
                username: root
                password: 111111
            flowable:
                driver-class-name: com.mysql.cj.jdbc.Driver
                url: jdbc:mysql://localhost:3306/y9_flowable?serverTimezone=GMT%2B8&nullCatalogMeansCurrent=true&useUnicode=true&characterEncoding=utf-8&rewriteBatchedStatements=true&useCompression=true&useSSL=false&allowPublicKeyRetrieval=true
                username: root
                password: 111111
y9-module-processadmin 工程配置:
spring:
    datasource:
        druid:
            y9-public:
                url: jdbc:mysql://localhost:3306/y9_public?serverTimezone=GMT%2B8&nullCatalogMeansCurrent=true&useUnicode=true&characterEncoding=utf-8&rewriteBatchedStatements=true&useCompression=true&useSSL=false&allowPublicKeyRetrieval=true
                username: root
                password: 111111
            flowable:
                driver-class-name: com.mysql.cj.jdbc.Driver
                url: jdbc:mysql://localhost:3306/y9_flowable?serverTimezone=GMT%2B8&nullCatalogMeansCurrent=true&useUnicode=true&characterEncoding=utf-8&rewriteBatchedStatements=true&useCompression=true&useSSL=false&allowPublicKeyRetrieval=true
                username: root
                password: 111111
配置机器所在的 IP 段,程序中会有获取当前机器 IP,特别是对于多网卡的机器
y9:
    internalIp: 192.168.x.x,10.0.x.x,172.20.x.x
3. 运行
将各个服务的上下文修改为对应服务名
| 工程名字 | 服务上下文 |
|---|---|
| risenet-y9boot-server-flowableui | /server-flowableui |
| risenet-y9boot-server-itemadmin | /server-itemadmin |
| risenet-y9boot-server-processadmin | /server-processadmin |
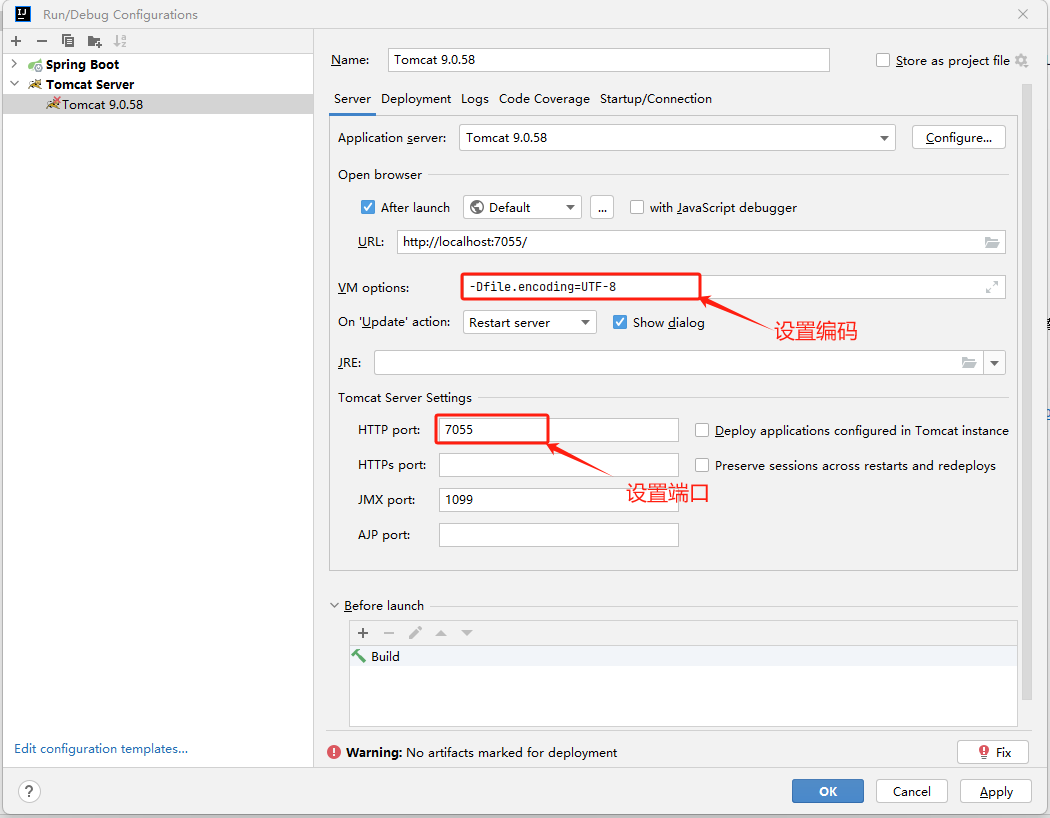
添加 tomcat 服务器,点击“Edit Configuractions...”,如下图所示:
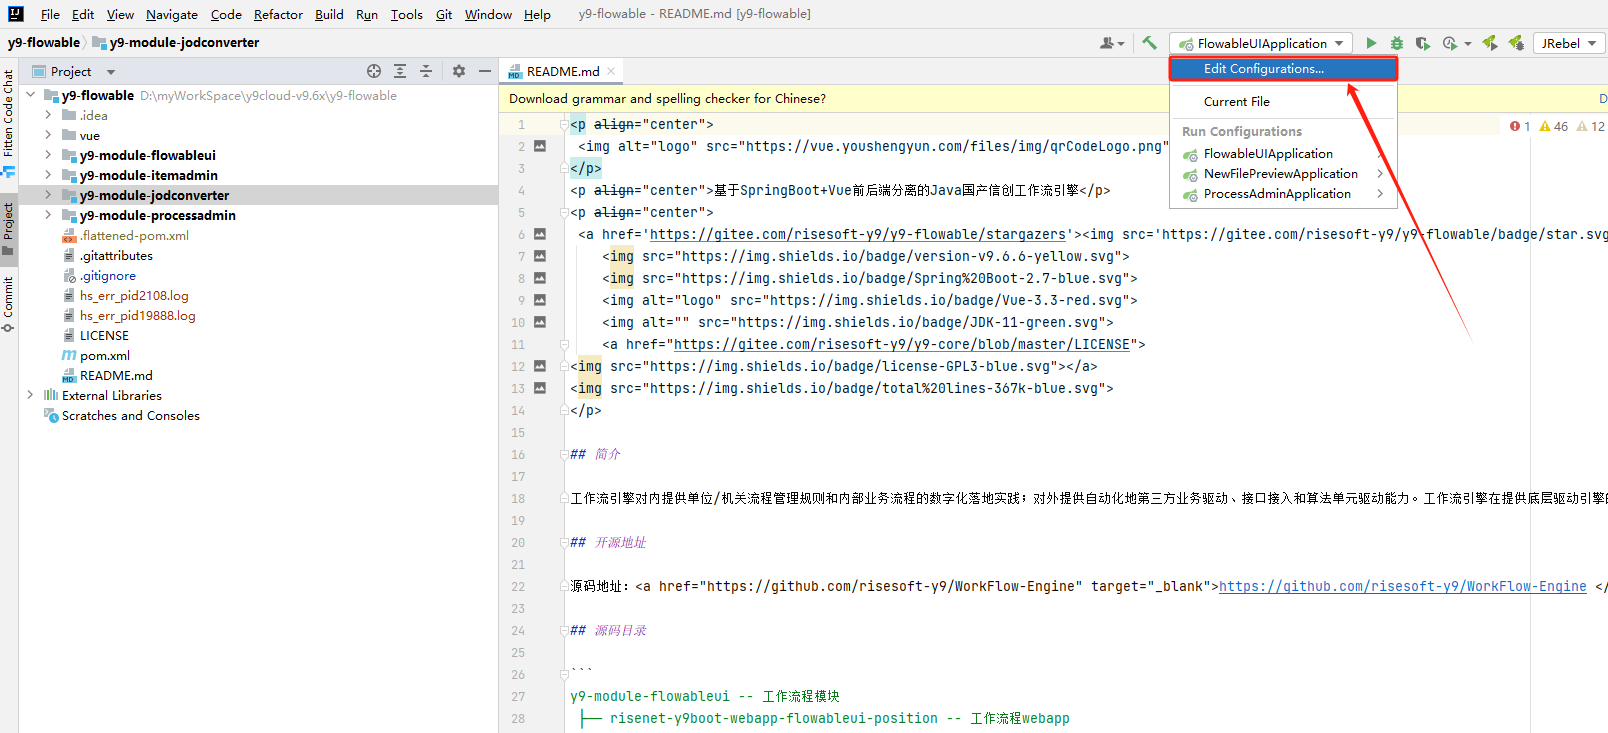
点击弹窗中左上角的“+”,在下拉菜单找到“Tomcat Server”,点击“local”,如下图所示:

设置编码和端口号,如下图所示:
4. 注意事项
编码格式: MySQL : 进入控制台或可视化工具,新建查询 : show variables like "%char%"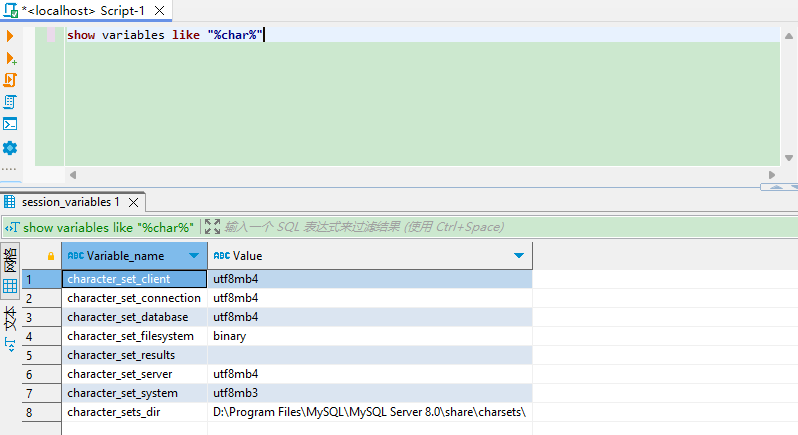
除 filesystem,其他必须为 utf8,在数据库(本地化) 部分有详细配置步骤。 也可以在数据库控制台使用 set character_set_client = utf8(不推荐,临时的) 等等,来设置。 IDEA: 左上角 File->Settings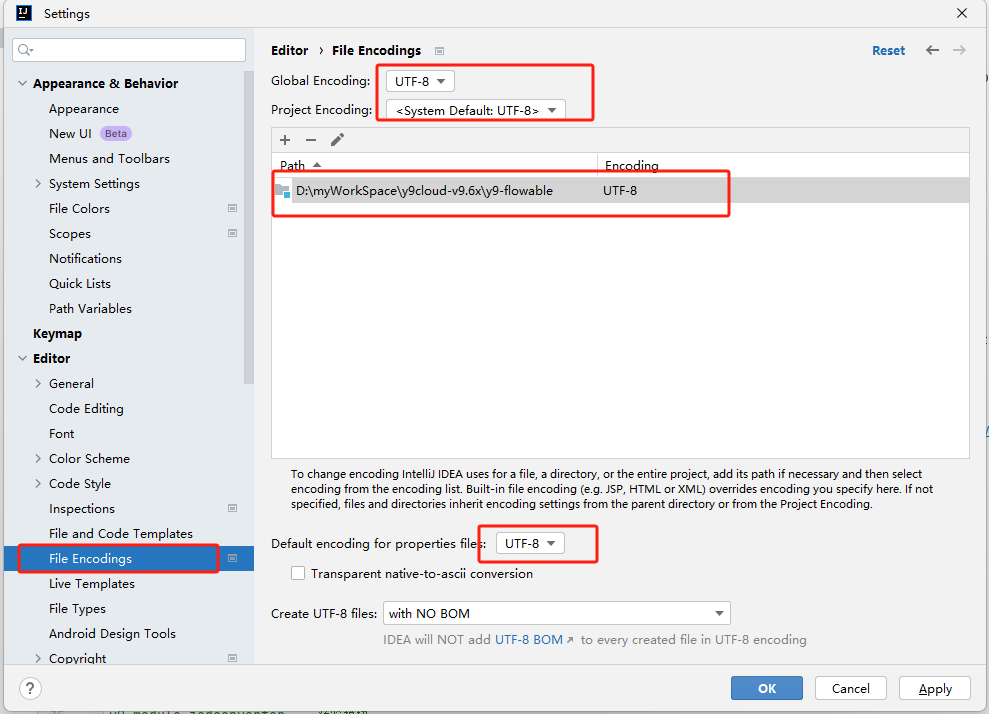
Eclipse
1.引入项目
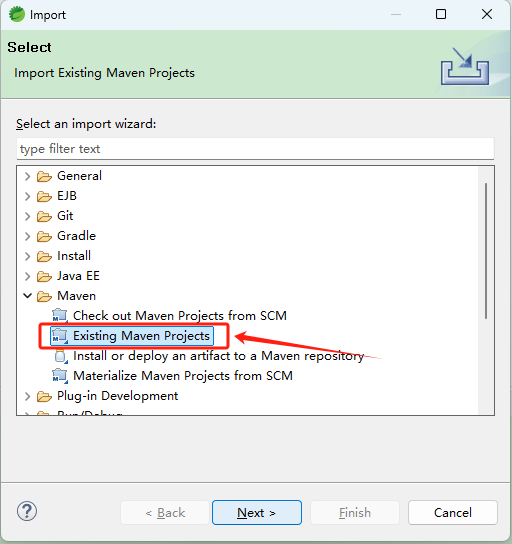
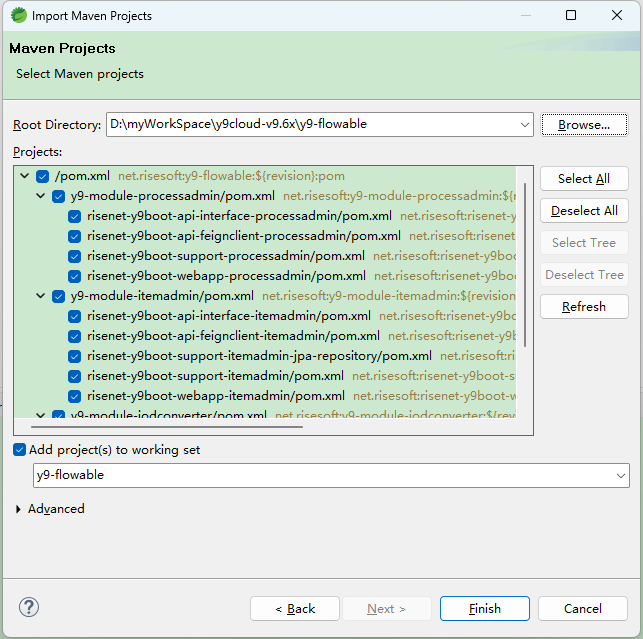
1、菜单 File -> Import,然后选择 Maven -> Existing Maven Projects,点击 Next> 按钮,选择工作目录,然后点击 Finish 按钮,即可成功导入。 Eclipse会自动加载Maven依赖包,初次加载会比较慢(根据自身网络情况而定)
2.修改配置文件
修改各服务的配置文件 application.yml,将 MySQL、Redis、Kafka 等服务端口和密码改为自己的服务地址和密码。(如果是按照数字底座的默认密码设置的各个中间件密码,则不需要修改配置文件。)
3.运行
注意:配置 Servers,注意端口请使用 7056,jdk 使用 11。
前端项目
1.运行前提
node.js 版本 v18.17.1 或者更高版本
这个项目里的配置文件是对应这套开源代码的后端代码,需要先在本地环境中,将后端的代码运行起来,才能运行起来看到页面效果。
2.本地运行
打开 cmd
$ cd vue\y9vue-flowableUI # 进入前端工程文件夹
$ npm i # 安装依赖
$ npm run serve # 依赖安装完成后,运行程序
$ cd vue\y9vue-itemAdmin # 进入前端工程文件夹
$ npm i # 安装依赖
$ npm run serve # 依赖安装完成后,运行程序前端工程默认使用 8080 端口。
如果需要部署到其他环境,可以执行 npm run build 或者 npm run build-test 打包部署至正式或者测试环境,需要修改.env.production 或者.env.test 中的配置
3. 访问服务
运行成功后,首先访问事项管理前端页面 http://localhost:8081/itemAdmin/, 在事项管理选择默认事项,复制事项链接信息访问事项应用 http://localhost:8080/flowableUI/index?itemId=xxxxxxxxxxx, 当然,也可以自己按照操作文档重新建一个事项访问(事项管理操作文档)
默认账号:
事项管理访问账号 系统管理员 登录名:systemManager 密码:Risesoft@2022
工作办件(flowableUI)账号 测试账号 登录名:user 密码:Risesoft@2022